How to make Pen drive BOOTABLE In Windows VISTA / WIN 7 In Easy Steps by disk manager
 |
| How to make Pen drive BOOTABLE In Windows VISTA / WIN 7 |
why we need bootable pen drive
there is many reasons for creating bootable pen drive
- to create bootable windows disk,
- or to create Live bootable disk for emergency backup,
- or for any bootable option, like bios updating, etc
step by step to create bootable pen drive
step 1–
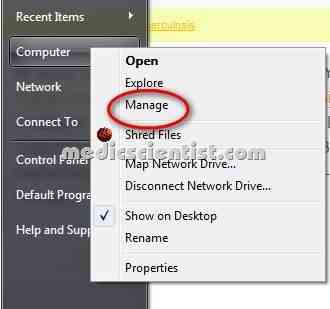
- go to task menu and right click on — my computer
 |
| Pen drive BOOTABLE In Windows VISTA / WIN 7 |
- now you will be in windows disk manager utility
step 2—
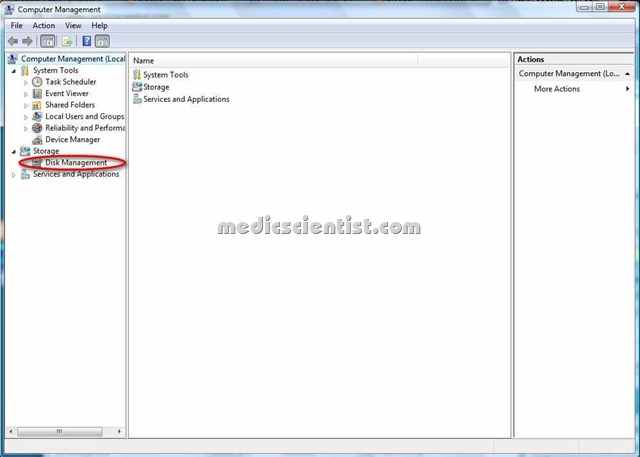
- select the disk management option below
 |
| BOOTABLE PEN DRIVE In VISTA / WIN 7 IN Easy Steps |
step 3–
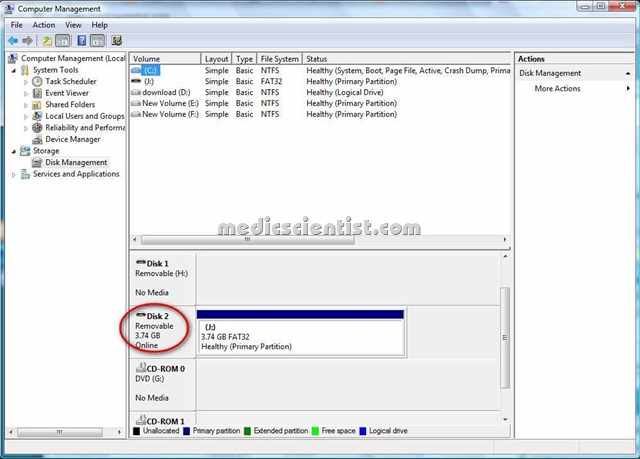
- now you will saw all your disks attached in computers
- from there select the removable disk
 |
| BOOTABLE PEN DRIVE In VISTA / WIN 7 IN Easy Steps 2 |
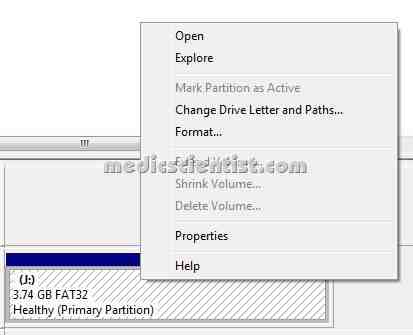
step 4–
- right click on it and click format
 |
| BOOTABLE PEN DRIVE In VISTA / WIN 7 IN Easy Steps 4 |
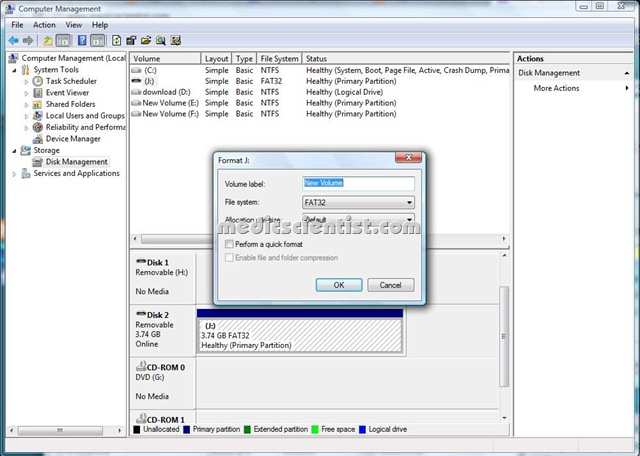
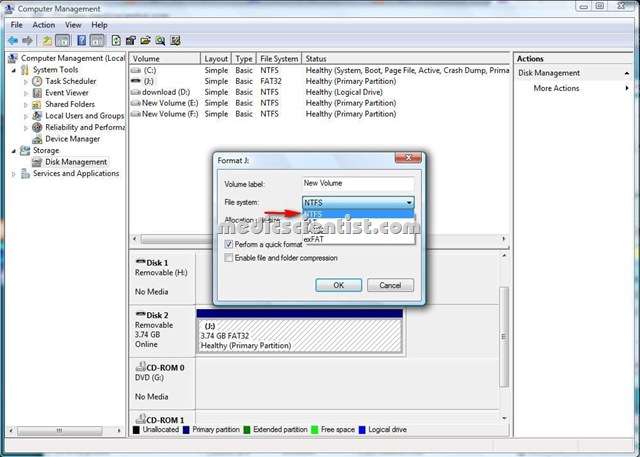
step 5—
- during format select ntfs option
 |
| BOOTABLE PEN DRIVE In VISTA / WIN 7 IN Easy Steps5 |
 |
| BOOTABLE PEN DRIVE In VISTA / WIN 7 IN Easy Steps5 |
- and click format or quick format
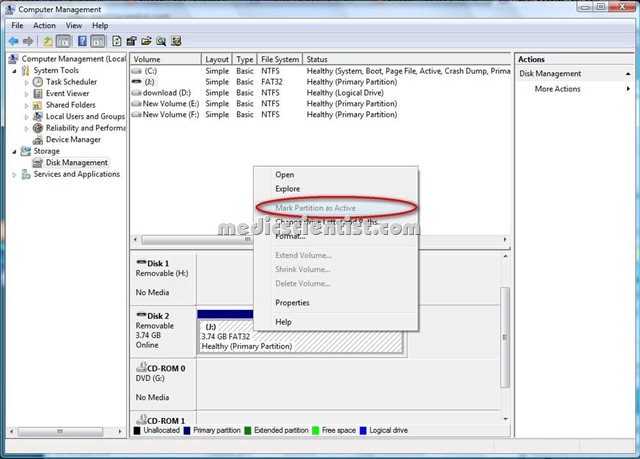
step 6–
- now final step right click on disk bar and select the make partition active option.
 |
| BOOTABLE PEN DRIVE In VISTA / WIN 7 IN Easy Steps |
- All done well now your pen drive is ready to boot .
NOTE–
- only windows VISTA / WIN 7 support this disk management options.
- some pen drives dose not support these functions, it’s the matter of brand you use, but max branded pen drive support this bootable options.
